Overview
Dooo - Movie & Web Series Portal App, contains both android source code and admin panel to build your Own OTT Platform with most popular features and eye catching material outlook. If you are planning to deploy your own OTT Platform for android users, then it's your right choice to have much flexibility on your hand.Android App Demo
Available in
Google Play Store
Admin Panel Demo
Email: demo@mail.com
Password: 12345
The product comes with an Powerful Admin Panel to Fetch Content Data Remotly From TMDB. You can update the design, what to show or not into the app real-time. You can customize many things using the Admin Panel like:
- Application Configaration
- Application Contents
- User Accounts
- Send push notification to users
- and more...
After purchasing, you'll have 3 files. Except the documentation, there are:
- Android Studio Source Code
- Admin Panel Source Code
Table of Contents
Admin Panel Installation
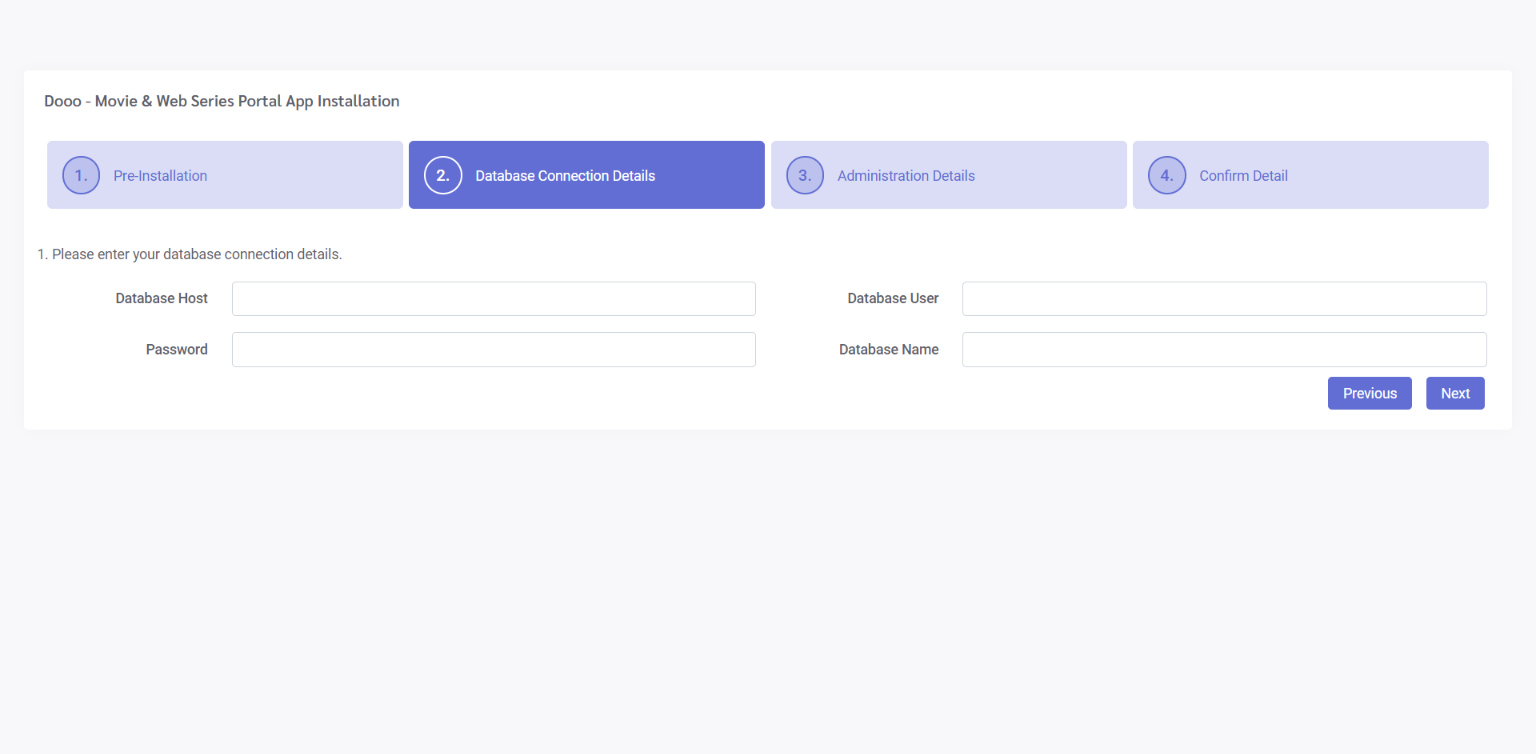
Before the installation, you'll need below information:- MySQL Database Name
- MySQL Database User's username
- MySQL Database User's password
- MySQL Database host
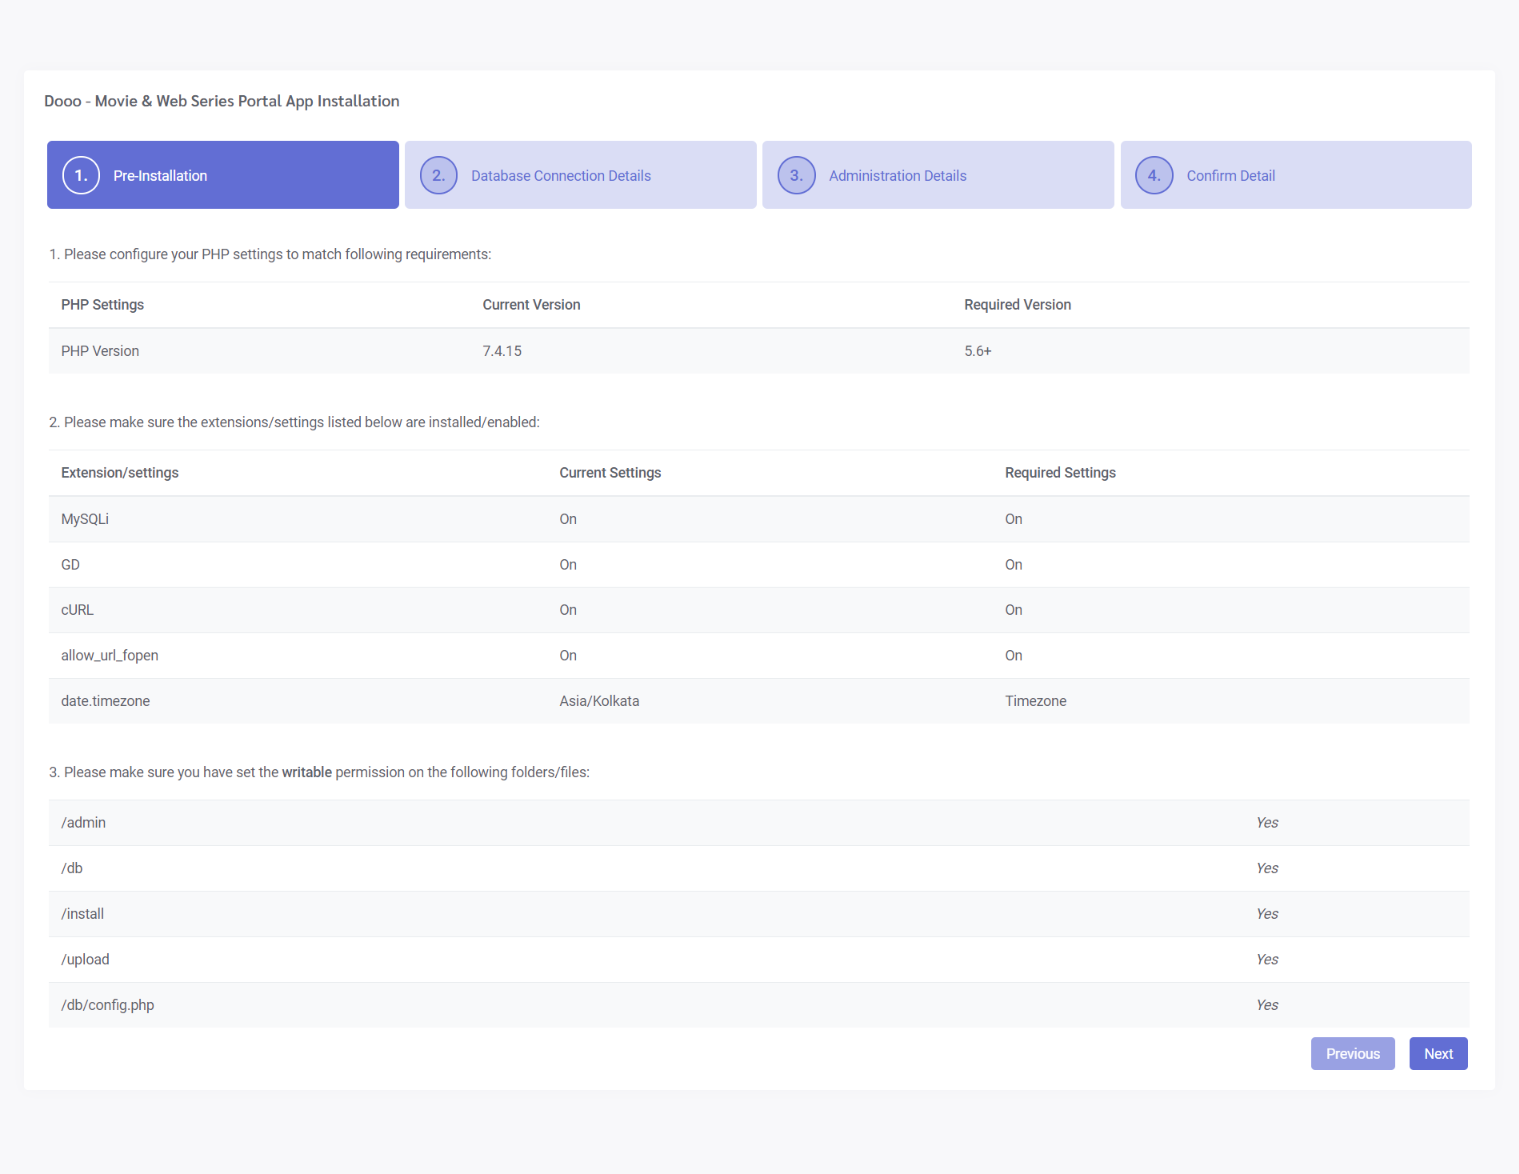
Then follow the steps to complete your Admin Panel Installation process:
- Unzip the file named admin_panel.zip and upload it to the
public_html(or other) directory of your website. - Go to your domain name to complete the installation process. For the first time, you'll see the Installation Wizard page.
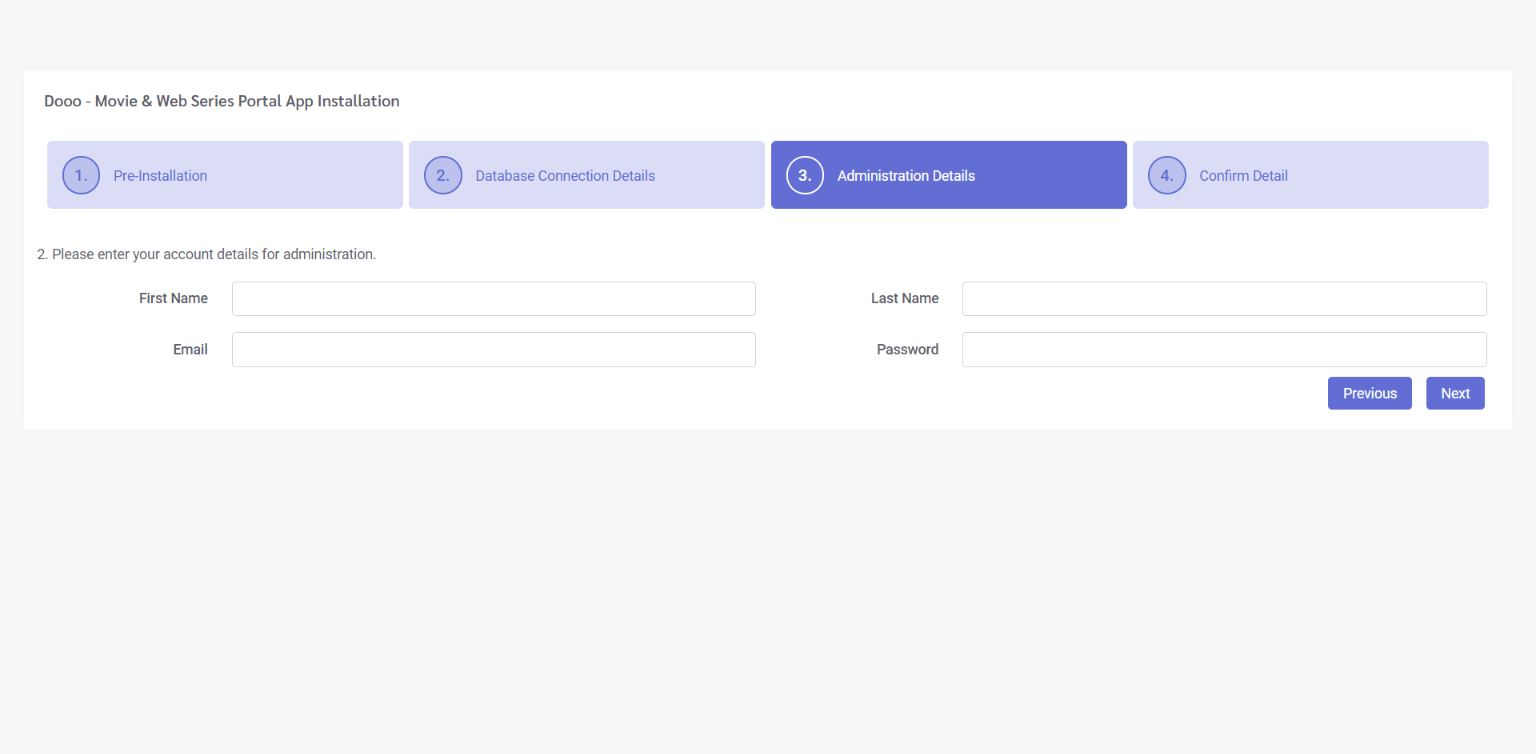
- Enter Database information, Admin Email and Password as login credentials and Proceed to finish the setup.
- Finally login using your Admin Email and Password
Firebase Connect
You will need to setup Firebase for the push notification feature and Analytics . Follow the steps to add firebase into your Admin Panel.- Create a New Firebase Project from Firebase Console
- Provide your Project/App Name
- Enable Google Analytics for the Project
- Select Android as project registration.
- Enter Package Name, App Name, SHA-1 Fingerprint and click Register App.
- Download google-services.json file and paste it inside the app folder of your Android App Source Code
Once you completed adding the google-services.json into your android source code and saved the Server Key in your Admin Panel settings, navigate to Push Notification from Admin Panel Sidebar and select an article to be notified to all users.
Onesignal Connect
Before the installation, you'll need below information:- Firebase Server Key (Copy From Firebase Project settings->Cloud Messaging)
- Firebase Sender ID (Copy From Firebase Project settings->Cloud Messaging)
Step 1. Create A Firebase Project
Push Notifications require a Firebase Project. If you don't have one setup yet, click Add project and follow the directions to setup your project.
If you already have an FCM project, skip to Step 2.

Step 2. Getting Your Firebase Cloud Messaging Token And Sender ID
Click the gear icon in the top left and select Project settings.

Select the Cloud Messaging tab.
Save the Server key and Sender ID.

Step 3. Configure Your OneSignal App's Android Platform Settings
In the OneSignal dashboard, select your app, then go to:
Settings > Platforms > Google Android

Paste your Firebase Server Key and Firebase Sender ID into the fields and click Next all the way to Save.

You will need to setup Onesignal for the push notification feature. Follow the steps to add Onesignal into your Admin Panel for Push Notification.
- Add New App in Onesignal
- Provide your App Name
- Select Google Android(FCM) for the Project
- Then Paste Firebase Server Key & Firebase Sender ID
- Then Select your target SDK, Offcourse, Its NativeAndroid.
- and Save
- Skip other things.
- Go to Onesignal Settings Keys & IDs Copy ONESIGNAL APP ID and REST API KEY .
- Navigate to Admin Panel's Notification->Settings menu and paste the Onesignal Api Key and Onesignal App id.

Admin Panel Update
Follow this Steps To Update Admin Panel- Edit php.ini in Hosting Server and edit upload_max_filesize and set to 512M -> upload_max_filesize = 512M
- Edit php.ini in Hosting Server and edit post_max_size and set to 512M -> post_max_size = 512M
- On Server Running On NGINX Edit nginx.conf Set client_max_body_size to 512m -> client_max_body_size 512m
Setting up with Android Studio
Before this process, you'll need to get ready with belows:- API SERVER URL from Admin Panel API Settings
- API KEY from Admin Panel API Settings
- google-services.json file downloaded from Firebase
Click the gear icon in the top left and select Project settings.


Then follow the steps to complete your Admin Panel Installation process:
- Unzip the file named android_source.zip and you will find a folder inside it named Dooo, This is to be opened in your Android Studio.
- Change the package name from com.dooo.android to your desired name.
- Change your API SERVER URL, API KEY in app_config.cpp file.
- Change value to
truefor Features you want in app_config.cpp file. - Replace Splash Screen Logo in res -> drawable folder.
- Replace App Logo (ic_launcher.png) from res -> mipmap folders.
- Change App Name (app_name) from res -> values -> strings.xml file.
Contact Us
Head over to our dedicated support Site HERE for any kind of queries.Also you can ask for further support like:
- Setting up the whole system in your Hosting
- Helping to upload app in Google Play Store
- Changing small things like App Logo, App Name, Splash Screen, Static texts, colors etc.